Christmas lights
22 Dec 2019For the TL;DR of this blog post, check out the hashtags #bariSaxXmasLights and #bassClarinetXmasLights on twitter
If you’re an amateur musician, or were a musician at school, you’ll know that one of the busiest months is December because of Christmas concerts. I’ve never really got the moaning over hearing Christmas songs for this reason - on average, we probably start practicing the music around September or October, so everyone else has it easy in my opinion.
As a bari sax player, my seat is next to the bass trombone (because we usually have similar parts, although bari sax jumps around and joins basically whatever section it feels like a lot more than bass trombone) and last year our bass trombonist had really sick fairy lights wrapped around the upper part of his instrument. It’s sort of a tradition that the second half of our christmas gig at big band is jazz flavoured christmas music, and as a “surprise” we all come out in santa hats and reindeer antlers, so lights and tinsel come along with that “surprise”. He’d not personally made them and they weren’t designed for the instrument, but I had a lot of envy. I wish I had a photo for this blog, maybe I’ll see if anyone took any of that gig later.
Anyway, around October I remembered this and that I’ve tried doing my own instrument related hacks in previous years and failed, generally due to trying to do too much. In particular, when I lived in Bristol (during my industrial year) I wanted to have a strip of neopixels running down the back of my bell which would listen to what I was playing and vary the colour based on pitch and the brightness based on volume. I don’t remember how far I got, but somewhere around the “physics is hard” part I gave up.
So, this year I decided I’d start, super, super simple.
BoM (Bill of Materials)
I went on Pimoroni and bought the following:
- One 2m long strip of RGBW LEDs
- Two 12 RGBW Neopixel rings
- One Adafruit Feather NRF52 express
- One Adafruit feather Huzzah
- (later I also bought) Two 3000 MAh LIPO batteries - I don’t need this much juice, but I figured I have the space to hide them
I don’t really need more arduinos for this project - I have probably 50 GEMMAs kicking around my house, a few trinkets etc but I bought these two boards (which are something around £20 each?) for the following reasons:
- Easy powering - both of them already have a JST connector for plugging in a LIPO, both have a USB connector for laptop power, and both have a charging circuit such that while you’re working on the code and testing at your laptop, you can give your battery a bit of a bump.
- A bit more umpf - generally a lot of the boards I’ve used previously have been small so that you can hide them, wear them etc. I didn’t need that for this project - the instruments I was installing lights on are a bass clarinet and a baritone saxophone, both of which have plenty of places to stash a larger board. This is good because if you want to do something more fancy you don’t need to be worrying about how much memory is left, and smaller boards tend to do “weird things” with bitbanging in order to fake serial connections.
- Options for future hacks - the huzzah has both wifi and bluetooth, the express just has bluetooth. While I suspect these will be a little fiddly to get going with, this means for both this project and other projects there’s options for doing cool stuff above and beyond just lighting a bunch of RGBW neopixels.
On the lighting front, I picked the 2m strip thinking I could wrap half around my bari, half around my bass clarinet, and the rings thinking I could stick them to something but most likely to my baritone which has much bigger moving pads and therefore more space without affecting the sound or mechanics.
As it turned out, the rings were the perfect diameter for my bass clarinet, and clarinets in general have much fiddlier and less spaced-out mechanisms than saxophones, so the rings both went on my bass clarinet and the strip wrapped around my baritone.
Well that was a bit bloody quick @pimoroni ! Reckon the rings will look best on my bass since they’re (almost) the same size pic.twitter.com/1gBCW9vimp
— Charlotte Godley (@charwarz) October 16, 2019
Bass clarinet build
Since my bass clarinet was at the time my new baby, I started on that one - it was also the more complicated build since I needed to space the neopixels to fit onto each pad. I did this quite crudely by cutting a long length of wire, putting it through the hole on one end then taking my cutters and cutting it with the neopixels stuck to my bass clarinet. To make sure there wasn’t too much strain on the wire I did also leave a fair amount of slack. This also helped me later if I needed to make changes or the wires failed or ripped as it means you can do repairs.
I think version 2 I'll make all the wires black, but so far so good - measured the input/output wire by physically sticking them on and then cutting, as you do. Keeping testing to make sure I don't end up with no pad movement which would be fairly bad mid-concert pic.twitter.com/kBcrzp9sXv
— Charlotte Godley (@charwarz) October 16, 2019
Finding black wire
I was quite keen to make this project look good and finish it to a high standard. One of the things I wanted to do here was make all the wires black so that it would blend in with the clarinet. This actually proved more difficult than I thought -
- The holes on these PCBs are very very small
- I was chaining power and ground together, meaning some of the holes initially needed to take 2 wires not one
- Maplin went out of business so I couldn’t go into a shop to check the gauges
I went on a whole journey around this, bought lots of wire on amazon which I then returned because it was too thick, even drove to an RC shop 30 minutes from me. In the end, I discoved that RS components have a trade shop in Watford which is nearby. Unfortunately, RS isn’t really meant for makers (hence why I miss Maplin now it’s gone for sunday hacks) so I bought…err…I think it’s a 100m roll of thin gauge black wire. That will probably last me a lifetime so if anyone needs very thin black wire, I’m your gal.
Initially though, I took apart some mini JST connectors which I had from a previous project. I highly recommend NOT doing this because the wires from those connectors are REALLY, REALLY small and flimsy so that was a big waste.
So the wire I got from the RC shop turned out to be waaaay too thick, and amazon sent me red wire, not black, so I settled on canibalising some thin cables from the mass of JST cables I had from a previous project.
— Charlotte Godley (@charwarz) October 19, 2019
Also found an @adafruit gem in my box so added to the chain pic.twitter.com/xelkXBj2yV
In addition to that, having soldered up the whole lot, I turned it on and…boom. Something went wrong with my soldering maybe and now my rings just won’t light past the first couple of LEDs on one ring, and the second board was very similar (might have been 2? Don’t remember).
Anyway, as mentioned in the tweet, I’d found a jewel which I’d never used for anything (I believe either @ukscone or someone else bought me this as a birthday/graduation gift a long time ago, so thank you whoever this was!) so I thought I’d strap that on the end. Turns out this jewel is RGB, not RGBW, so the kablooming of the other LEDs at least gave me a reason to buy some rings which were the same signal type. Swings and roundabouts.
Turning them on
Having fiddled with the electronics for a while, I started to do some “coding”. By this I mean, stealing sketches or examples from other people. For the first pass I was keener to make sure it all worked, looked good and didn’t damage the instrument than I was to fiddle with LED patterns, so I started with a test sketch from a paintbrush library. This turned out to create a somewhat unintended effect:
“I might get rid of the top one”
— Charlotte Godley (@charwarz) October 26, 2019
Bf: why?! That’s the best bit!
Me: it’s meant to be doing the same as the other two, I don’t want to induce epilepsy during my gig pic.twitter.com/BhmmAieOng
I’m still not 100% sure what the problem was here, I think it’s a combination of:
- Powering - I’m using a 3.7V battery and the regulator on the board only gives you either pure battery or 3.3V. Ideally neopixels are 5V, though they can work ok with less (just not more!)
- Resistance - the wires have their own resistance and by the end of the chain, this is probably just getting too high.
- Memory - Neopixels aren’t just on-off devices and do have a controller on each board (maybe in each LED? Don’t quote me on this) and the sketch I was using was a “fancy” brush library thingy. It might just be using up too much processing power and memory between these two issues.
For the former, I tried using a voltage regulator to bring it up to 5v. This completely changed the colour of the LEDs to something I’d not told it (was like greeny/reddy) so that made things worse. For the latter, I tried using capacitors at the edge of each board. This proved entirely pointless.
In the end I moved on to using a sketch from the Adafruit Xmas lights tutorial and this worked just fine.
#bassClarinetXmasLights looking a lot more finished - I’m getting around the header pin issue bu just soldering to them, that should make it easier to reuse it later (and also test things out like buttons etc) pic.twitter.com/IwfLXt4AGh
— Charlotte Godley (@charwarz) November 8, 2019
Diffusers
This is all well and good, but I wanted to diffuse out the light a little to make sure I didn’t distract the people sitting next to me or blind those on the front row of the audience (which, as it turns out, front row was very very close to the band so this was a good idea).
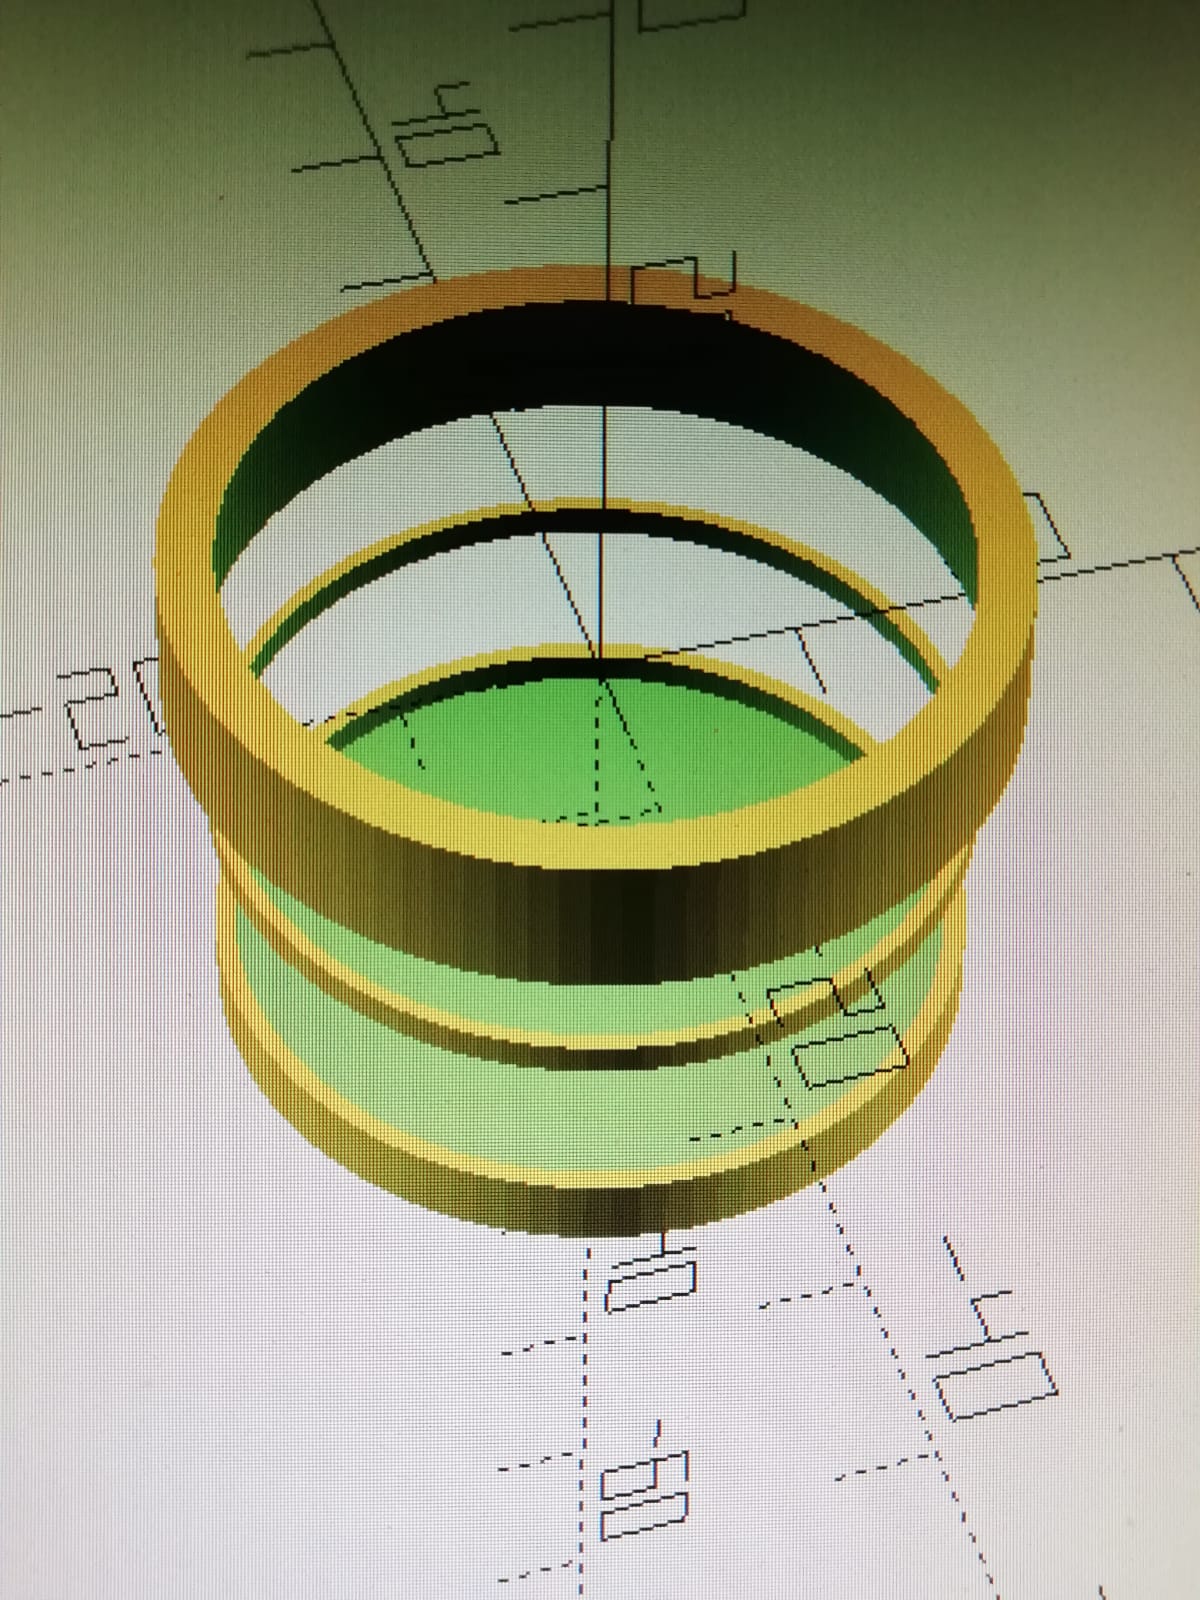
I was out in York at the time texting my dad, who has a 3D printer and loves making stuff that solves a problem, be it for him, my mum or my brother in law. So as he was texting me about his latest print endeavours, I decided to ask if he could come up with a diffuser design. I’d already been texting about the powering and flickering problems, so it was a natural cadence.
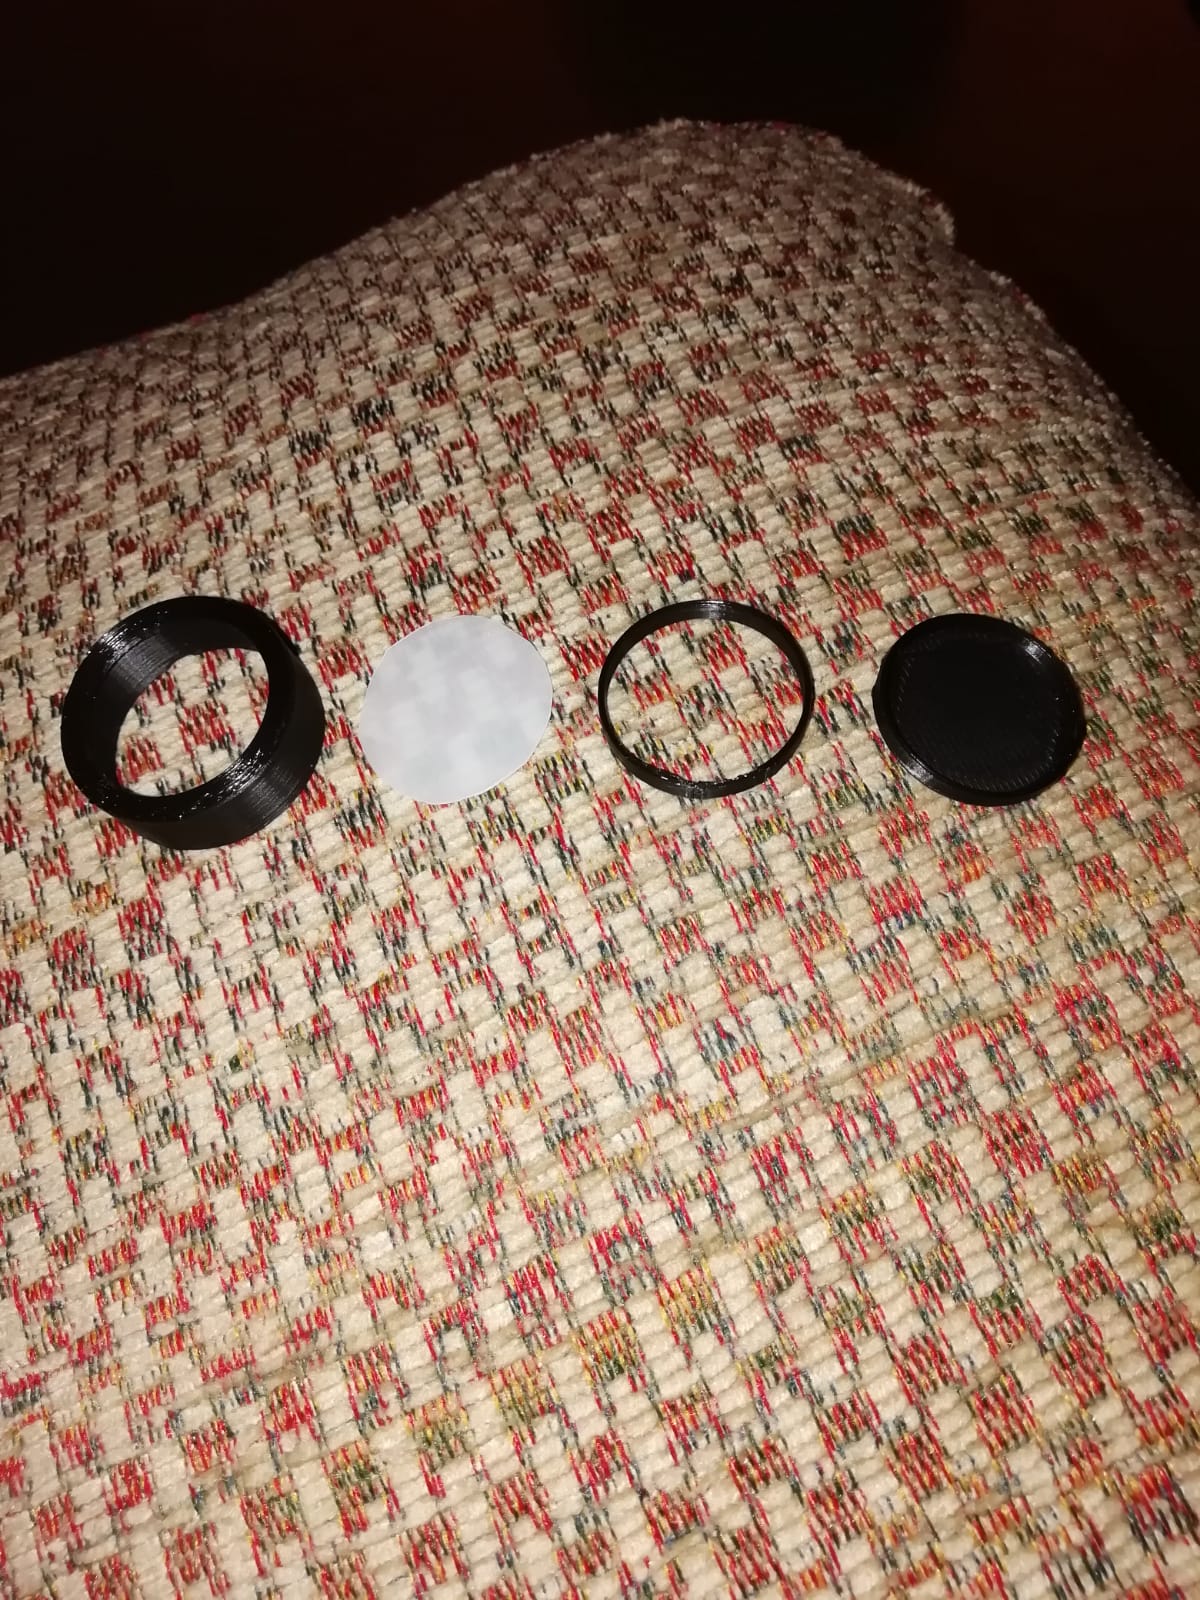
By the time I was back to our Airbnb in York, having only sent him a couple of links to the stuff I’d bought and not having measured the actual tollerances on the boards whatsoever, my dad had already designed a print, printed it, and cut out some milk bottle plastic circles to act as the diffuser material.
A few weeks later I was back at my parents house, while there I desoldered a bunch of connections to make them fit properly in the cases and took the lot back home where I turned it on.
Hard to tell with twitters crap video quality but #bassClarinetXmasLights diffuser cases are looking good (dad 3D printed the sides and base then cut milk bottle plastic up to use for the diffuse part) pic.twitter.com/j2QXgxzxV1
— Charlotte Godley (@charwarz) November 17, 2019
Things were finally coming together.
Bari sax build
I felt that the bass clarinet lights were pretty much done at this point so I moved on to the easier build for my baritone sax. Turns out you can use up 2m of LEDs quite easily given the size of the instrument:
When I bought 2m of LED strip, I wasn’t sure I’d need it. Turns out it’s not that hard to use up doing this #bariSaxXmasLights pic.twitter.com/Ji7ZguCntr
— Charlotte Godley (@charwarz) November 23, 2019
There’s not as much to note here on this build - I pretty much just needed to solder a 3 wire JST connector to the other board and I was done. To make sure it all played nicely though, I did test out the strip to Lana Del Rey:
LED strip goes surprisingly well with Lana Del Rey (working on #bariSaxXmasLights now) pic.twitter.com/eDkZh3r7KY
— Charlotte Godley (@charwarz) November 23, 2019
I did attempt to do a bluetooth connection to my phone to see if I could control it and/or allow me to turn it off should it be annoying to people, but I could never get this to work despite using the official Adafruit app and sketch. Next year’s job.
Diffusing
Again, I wanted the LEDs to be diffuse. I’m not sure whether I actually liked the resulting effect here, but my assumption when “building” the diffuser was the steps would be simple:
- Get baking paper
- Stick one sheet of baking paper to LED strip using tape
- ???
- Profit.
Turns out waxed paper (which is what baking paper is) doesn’t play well with sellotape or plastic, so what I ended up doing was wrapping several layers around it tight and then kind of tension taping it all together:
1.5 hrs till gig and I’m wrapping an LED strip in baking paper - pro tip, your project isn’t finished until it’s *actually* finished pic.twitter.com/N5BiUdqez3
— Charlotte Godley (@charwarz) December 7, 2019
Playing the gig
Here’s the final tweet from my gig (photo 1 taken after assembling my instruments and sticking copious amounts of velcro on, photo 2 taken after completing the gig):
I’m definitely living my best life #bariSaxXmasLights #onlyonePatchOfVelcroFellOff #bassClarinetXmasLights pic.twitter.com/lfu3ZX2qLQ
— Charlotte Godley (@charwarz) December 7, 2019
Overall, gig went really well - we were playing half disney, half christmas music this year so everyone knew the tunes and despite me spending far more time building my decorations than actually practicing, the reception was good from band members and audience members alike. The lights probably went down better with my bandies than audience (you can’t fully see the lights because I was bang in the middle, which given we were playing in a theatre meant that the lights had the most intensity directly over me), but whatever. It was fun.
Next year
My boyfriend suggested next year we do pyrotechnics (I’m thinking flame thrower in the bell), but apart from that, what I hope to do next year is
- Hook up cheerlights to one or the other
- Hook up my phone and have multiple patterns/options loaded onto the microcontroller to allow me to change what’s playing
If I get bored/achieve one or both of those, maybe I’ll get back to adding a microphone and doing all the physics shit for colour changing. I doubt it.
At work now there are hackdays once a month (I’ve changed job again), so I’m hoping at the first hackday I can bring the lot in and work on the first point, to exemplify that you can work on stuff that’s not directly related to work.